Standard Service – 3-5 Business Days
Expedited Service – 1 Business Day
Last Updated 7/27/2026 at 8:48 AM
Last Updated 7/27/2026 at 8:48 AM
Standard: 3-5 Bus. Days; Expedited: 1 Bus. Day
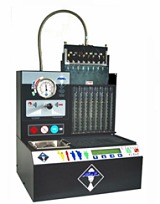
At InjectorRx, we use a proprietary manufacturer-approved fuel injector cleaning and flow testing process which employs special computer-controlled testing equipment. Using this ultrasonic cleaning method, we restore dirty, clogged, gummed up or leaking fuel injectors to operate at the same level and standard as if it were brand new.
If we cannot restore your fuel injectors to like-new condition, you will not be charged for those injectors we were unable to restore.
Please note: Reconditioned or remanufactured fuel injectors are used injectors that have been ultrasonically cleaned, flow tested and fitted with new O-rings, filter baskets and pintle caps.
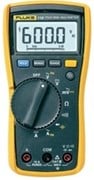
Once we receive your injectors, we first Ohm test them to determine their current resistance capacity. Sometimes, an injector fails the resistance test, which reflects an electrical issue which cannot be restored. These injectors are set aside and marked as “bad” before being returned to you.
Injectors that pass the resistance testing process are externally cleaned, then inspected for visible external damage. Visual cracks and exposed coil winding are also rejected at this point and will not be serviced, but will instead be returned to you and marked as “bad”. Rejected or bad fuel injectors cannot be reused because they could pose a fire hazard.
Once Ohm testing and visual inspections are complete, the remaining viable injectors are numbered and passed through to the next step of our process.
Note: We do not charge for any of the diagnostics we performed on injectors that are not serviceable.
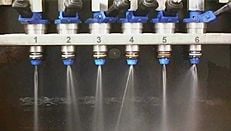
In step 2, viable injectors are loaded into in our computer-controlled testing machine where they are tested for reluctance. If an injector does not function at this stage, they fail the reluctance test they are deemed irreparable. During the testing process, the fuel injectors are pressurized to +/- 45 psi /3 bar and visually checked for pintle, ball or disc seat leaks. Spray patterns are checked for proper, even atomization and distribution. Finally, a flow test is done to determine the amount of fuel delivered.
Note: GDI or direct injectors are tested at the higher pressure of 73.5 PSI (5 bars). All test procedures for direct injectors are factory-approved.

Any removable components for which there are manufacturer-approved replacements, such as O-rings, filter baskets, and pintle caps are removed. The injectors are now ready for the ultrasonic injector cleaning process and placed in an ultrasonic bath containing a proprietary hot, biodegradable, environmentally-friendly cleaning fluid.
During the ultrasonic bath, injectors are opened and closed at various speeds approximately 25,000 – 30,000 times. Cleaning fluid enters the injector nozzle and, in conjunction with the ultrasonic sound waves, start to break loose any dirt or debris inside. Once this process is completed, they are back flushed to remove all traces of dirt and contaminants.

Now that your injectors have been visually and electrically inspected, flow-tested, and cleaned, the injectors are now reinstalled into the injector flow testing machine, where they are again checked for leaks. Upon passing the leak test, injectors are again tested for atomization and distribution. Next, dynamic flow testing is used to determine the injectors’ output volume under a set fuel pressure and various rpm. Last, a static flow test is performed. Flow testing results are compared to see if they match those in our manufacturer standards database.
Once all the required tests are passed, new O-rings, filter baskets and pintle caps are installed. (Replacement rings, baskets, and caps are subject to manufacturer availability). The cleaning process is now complete, and the reconditioned fuel injectors are lubricated before being carefully packaged for return shipment along with a comprehensive flow-testing report for the owner.
Note: We don’t easily give up on leaking injectors or the ones that prove difficult to clean. In most instances, we will keep on trying until the injectors work the way they should. When we service fuel injectors and cannot restore them to function like new, we will not charge you for the extra time spent.